Tips
on Modifying Front Derailleurs to Handle Extreme Gear Range
|
|
|
It is difficult to make a 'one size fits all' derailleur. Shimano's S.I.S. concept has let them develop drive trains that are optimized for one set of gears. This has provided an optimal solution for the hardware while pushing the 'one size fits all' onto the rider in terms of gearing. Since bikes are designed for the mass market and driven primarily by the racing demands, those who don't fit that predefined criteria are left with few options. Because they are not part of that mass market, developers are reluctant to invest the time and money into developing specialized products for them. Sometimes it just takes someone with a lot of passion and patience to preserver until an idea catches on. Recumbents and hand cycles are a good example of that. So until I have time to develop a set of super wide range derailleurs, let's step back to the early days of mountain biking and do what we did then; start with the closest part available and modify it to meet the need. I'll give you the critical information you need to get started. Your first attempt doesn't have to look like a show piece; you just want it to work. Once you've accomplished that you can work on making it pretty. If you get really good at it and are really ambitious you may develop it into a viable product that you can market or sell to someone else and get rich off of all the royalties. (If only it was that easy) |
|
The good thing is
that almost all triple derailleurs have enough travel to handle four
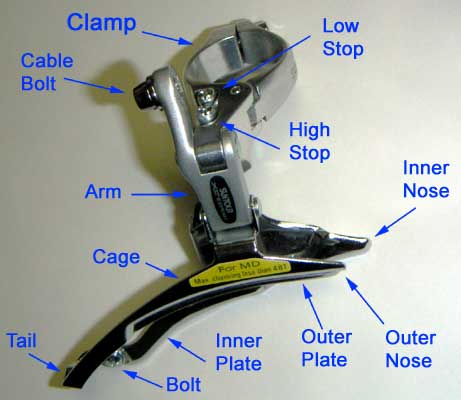
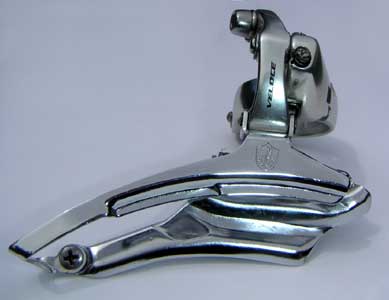
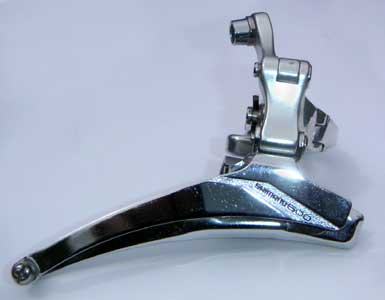
chainrings as long as the crankset is in the proper position. The basic problem is that derailleur cages are not designed to handle very large and very small chainrings at the same time. Raising the derailleur to clear a large outer chainring means the back of the cage is also raised and when you try to run a small triple or quad the chain may drag on the bottom of the cage. Sometimes you can cut the outer plate to match the outer chainring exactly, which will let you drop the derailleur some. For example if the derailleur is designed to handle 52 teeth and you outer ring is only 46, you have quite a bit to play with. The next option is to extend the bottom end of the cage. In extreme cases, I've made the entire cage from scratch. If you want to run 5 chainrings, you will probably have to modify the stops or make new, longer arms. Key Points you would ideally like to achieve:
|
Derailleurs
come in several different flavors:
|
||
wide range | close range |
|
Obviously the first three
have to match you bike. It's the last one, we need to address
here. If the two outer chainrings are close sizes to each other (half step), the inner plate of the cage can not be wide, or it will hit the teeth of the second ring. If you raise the derailleur high enough to clear it, the outer plate will be to high. Shifting will be poor and the chain could get stuck between the outer ring and the cage. |
The Basic Process: I'll add photos when I get a chance.
|
|
No way! How are you
going to solder to chrome? That's impossible!!! No problem. In fact, it's really very easy, IF and only if you have the right flux. I use stay-clean flux from J.W. Harris Company with a regular rosin solder or a silver bearing solder. It will do a beautiful job and won't damage the chrome. It will also solder to stainless steel. If you don't want to get into the soldering you can use an epoxy, such as JB Weld. Don't use the cheap 5 minute stuff. It's brittle and may not bond well. Hysol makes some good ones. If you go this route, it would be advisable to secure it with a flat head screw as well. |
Making
the Extension You'll need a small piece of metal sheet. I'd recommend .062" (1/16") stainless steel, though you could use mild steel or brass. If the derailleur cage is aluminum you will have to use aluminum. Use 6061 or 2024 and be very careful bending it or it will crack. There are solder fluxes that work with aluminum also or you can use aluminum brazing rod which can be welded with a propane torch. Practice before you try it on your derailleur.
|
Other Notes: Be careful if you need to bend the derailleur cage. Some use very hard steel which will crack if you bend it too far or too quickly. |
|
Back to FAQ Return to Mountain Tamer Home page |
Copyright 2004 NTU Enterprises |
Half-step was very common place in the early days when freewheels only had 5 or 6 cogs. With that set-up, if you wanted to shift through every gear (and you usually did) one would shift the front every time you shifted the rear. This was the only way a wide gear range and close gear spacing could be achieved. Today the ratios on the cassette are close enough and the chainrings are used as a range shift. Many of the gears are duplicated. There are ways to optimize the gears set for one's particular riding style. We're back to that mass market - 'one size fits all' syndrome again. An example would be to set your cassette spacing at 12% and using the half step to split it so you have 6% spacing when you want it. On a mountain bike this usually isn't even an issue because the terrain changes constantly, but on a road bike and especially on tandems, it's really nice to have closely spaced gears when you want them. If people are interested in this let me know and I'll do an article on it. back |